Frank-N-Filter
Build a 0-ppm water filtration system
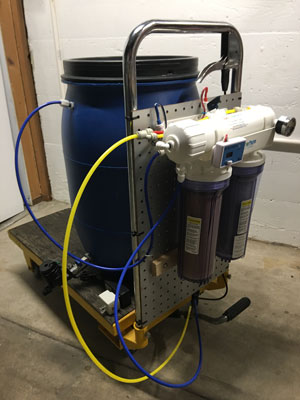
Bringing together multiple components to create a fast and efficient 0-ppm water filtration system, dubbed the Frank-n-Filter by the author. Photos courtesy of John Lowry
If you’ve worried about your water chemistry like I have, then you know how tricky it can be to get minerally consistent brewing water from any municipal supply. One possible upside to being on a municipal system is that some provide a mineral content report, which you can enter into your brewing software. But not all water departments provide that information and I don’t really trust the numbers I do get. You can buy water, but that is cumbersome and the cost adds up. You can send a sample of your tap or bottled brewing water to a lab to know the mineral content for 100% certainty. But this is an added cost and it’s only as reliable as your last sample and some municipal supplies change from month to month. Now I know brewing water doesn’t have to be perfect, but I’m tired of knowing little of the brewing water sourced from my municipal water supply.
We’ve had a reverse osmosis (RO) unit under our kitchen sink for years that’s produced great water but, due to leaking issues, was finally retired from that role. So, instantly my “brew-brain” kicked into thinking about how I could use this recently retired unit in my homebrewery . . . and not so much about how my family is going to get non-chalky ice cubes from the fridge in the foreseeable future. Don’t judge . . .you probably have a few of your own scores to boast about.
In researching what I needed for my brewing water filter (and yes, something for the family icemaker eventually) I learned about deionized (DI) or demineralized water and how scientists, aquarium owners, and car washes use it to filter their water. I also learned that during the RO membrane lifespan it removes ~99.9–85% of the solids from source water before replacement. My older RO membrane(s) showed 77 ppm (an 81.6% reduction in total dissolved solids or TDS), so they needed to be replaced. DI filter lifespans rely on receiving the cleanest water you can achieve prior to the deionization process.
There are a ton of choices out there, and you can get everything you need all in one setup if you’re buying new. “Reef”-type setups piqued my interest, as they were RO units with DI and carbon-block post filters. Since I already had the RO part of the unit I ordered a spot-free car rinse system to combine with it.

This unit consisted of two standard filter housings connected to each other and attached to a bracket, with 10-in. (25-cm) mixed-bed DI filter cartridges included. You can choose single-bed cartridges for each housing, which I’m doing next time to help minimize cost and maximize efficiency. If either filter’s plastic resin beads exhaust before the other, you don’t waste unused resin like with my mixed-bed resin. Some resin changes color as its filtering ability diminishes, making it easy to know when the resin needs to be replaced.
Now that I had everything, it was time to Frank-n-Filter this thing.
Tools and Materials
- TDS meter
- Plumber’s tape
- Filter housing wrench
- New or used RO unit (typically 3–5 stage filtration) with mounting bracket and flow control
- Permeate pump (mine came with my RO unit because 60 PSI is needed for a membrane to function effectively)
- Optional 2nd “matching RO membrane” (all membranes used have to match the flow control)
- Dual-deionizing filter housings with mounting bracket
- (2) 10-in. (25-cm) refillable resin filter cartridges and the resin you plan on using (mine came with full, refillable mixed-bed media cartridges)
- Necessary plumbing connections
Steps
1. Assemble the Pieces
Buy a total dissolved solids (TDS) meter before anything else and test the water you will be using. They aren’t very expensive (mine was $20 USD) and it helps knowing when to change filters and membranes. Now we can assess the situation and disassemble all the things that don’t work for your version or are broken, as was my case. I had a couple of older filter housings that wouldn’t fit to replace my RO unit’s broken housing and another RO membrane and its housing my parents gave me when theirs was replaced. I wanted to incorporate them into my build, as they were just gathering dust and would give my system its second RO membrane. More on that in a bit.
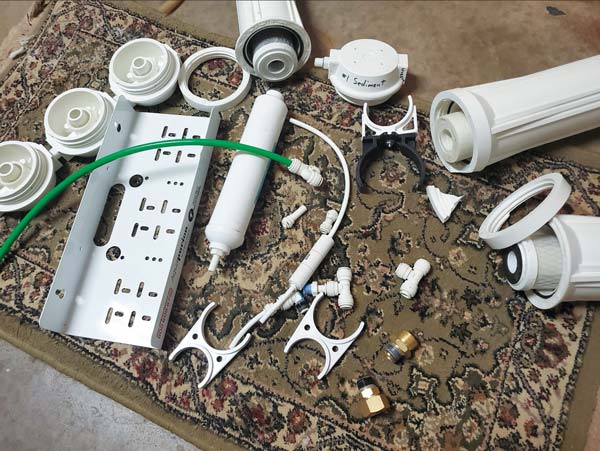
2. Lay out the Pieces
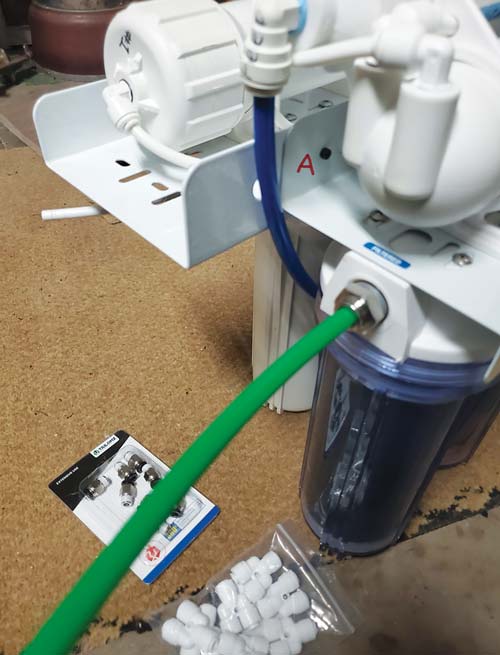
Figure out what’s going where so you can see any other products, tubing, or fittings you will need to make a project list. Determine your fittings/additional filters based on your project because yours will be different. I did all of this and then I ordered everything off my list from the internet. It took me three tries, so hopefully you plan better than me. I wish I had known the different size housing fittings (every housing I have is different), so I’ll be nice enough to list what I found to save you some headaches. You will find my RO unit with the to-tank fittings, filter housings, and housing bracket removed in the following photo. It’s attached now to the top of the Spot-Free Rinse DI filters. My old RO unit will be the secondary because of how things are already plumbed. I’ll add the other bracket, filter housings, and RO in a bit.
3. Filter Arrangement
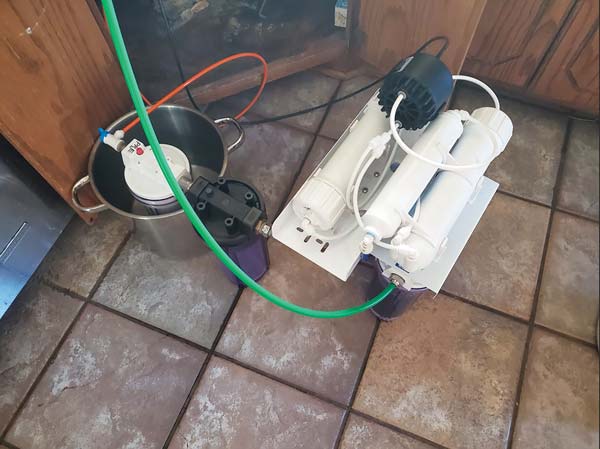
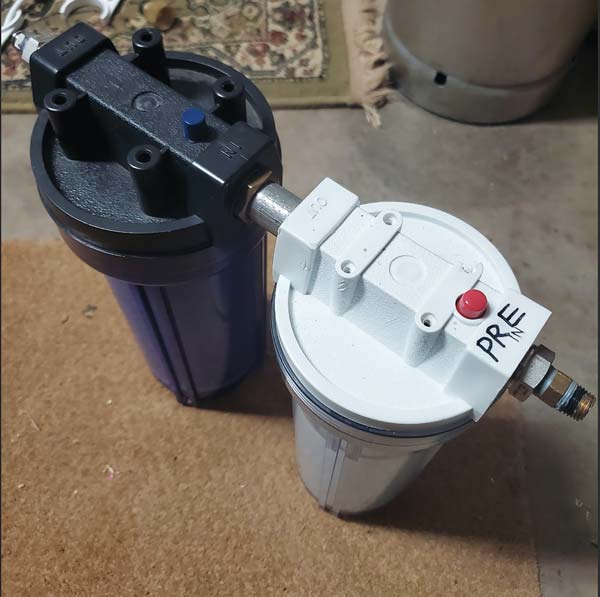
Pre-filters are very important to preserving the longevity of your more expensive RO membranes, so they really are required and need replacement when due. I’m going to keep a log book of gallons made with my system. The photo below shows the two spare housings I added because my RO unit lost its sediment filter housing to the leak to end all leaks and my RO system’s retirement. Both the sediment and carbon block will filter down to 5 micron, thus protecting my RO membrane(s) from any larger particulate matter.
4. The Build
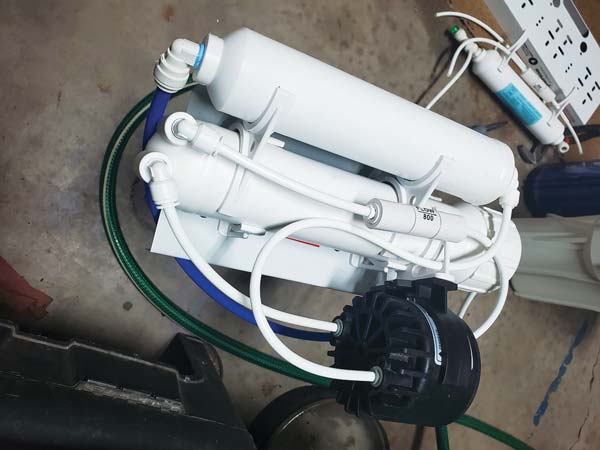
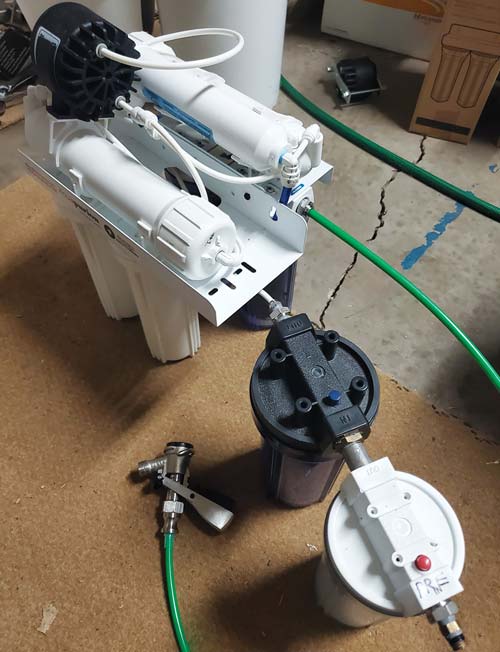
It’s frank-n-time! Now all the fixture brace parts need to come together so I can carry my filter unit. I also went ahead and attached everything I could with what I had from order number two. That little black bolt (A) is 1 of 3 spaced out evenly to distribute the weight and connect the two unit brace brackets for support. Since the filter housings are different heights, I drilled and matched the holes to the other side so they were equal when assembled. Drill one side, line them up back to back with all filter housing installed and mark the holes, then drill your marked holes. Bolt them together and you have a single unit now.
5. Gaining Efficiency
Photo 5 shows the series-double RO membrane is finally connected to the pre-filters and DI post-filters. Why the double RO you might ask? Well, in my research I came across some information about the waste-to-production ratio of RO, which we all know is bad. This helps to lessen my wasted water and almost double my RO output to my DI filters. Let me explain . . . I use wastewater staging to get a ratio of 1.5-gallons (5.7-L) brine (wastewater) to 1 gallon (3.8 L) of permeate (the good, filtered water). This, as a single unit, would get around 2.8-to-1. If running parallel it would actually be worse at 3.125-to-1.
DIY or buying new, you need to determine how much pre-filtration and TDS you want removed to prolong your DI filter lifespan, because DI resin is the magic that gets us basically to zero TDS. My unit’s filtering path starts with the supply water going into the pre-filters. It then flows to the white filters (old carbon-block RO filters) and the first RO membrane, where the permeate mixes at the y-connection with the second RO’s permeate. Now, into the permeate-in side of the black pump. This happens simultaneously, while the brine from RO one feeds the supply of the second RO membrane. The brine from the second passes through the flow restriction and then connects to the brine-in side of the pump. The brine then exits as a single unit would, to your drain. The pump outputs the good water through one last carbon filter on its way (blue tubing) to the clear DI filter housings before exiting as near-zero TDS water (green tubing).
6. Test Run
I pulled out my TDS meter and hooked up the Frank-n-Filter to the old fittings under my sink for testing. The supply out of the tap came in at 420 ppm, post-dual ROs was 77 ppm, and post-DI was 0 ppm at close to 1.8 gallons (6.8 L) per minute of output. The DI unit I bought said it was good for about 30 gallons (113 L) of “normal” hardness tap water at 0.75 GPM/2.8 LPM (it had a restrictor fitting that I removed). Running RO through it makes it last a lot longer and the pulse action of the RO pump allows a period of time for water to react, sitting still with the beads. In the near future I’m going to replace my RO membranes, move to individual ion resin housings (one cation, one anion) and buy matching pre-filter housings, but overall I am very happy! After testing I rigged up a keg tap to fill my Sanke kegs for brew day.